Skip to content
 How to Plan & Take Photos from an Airplane
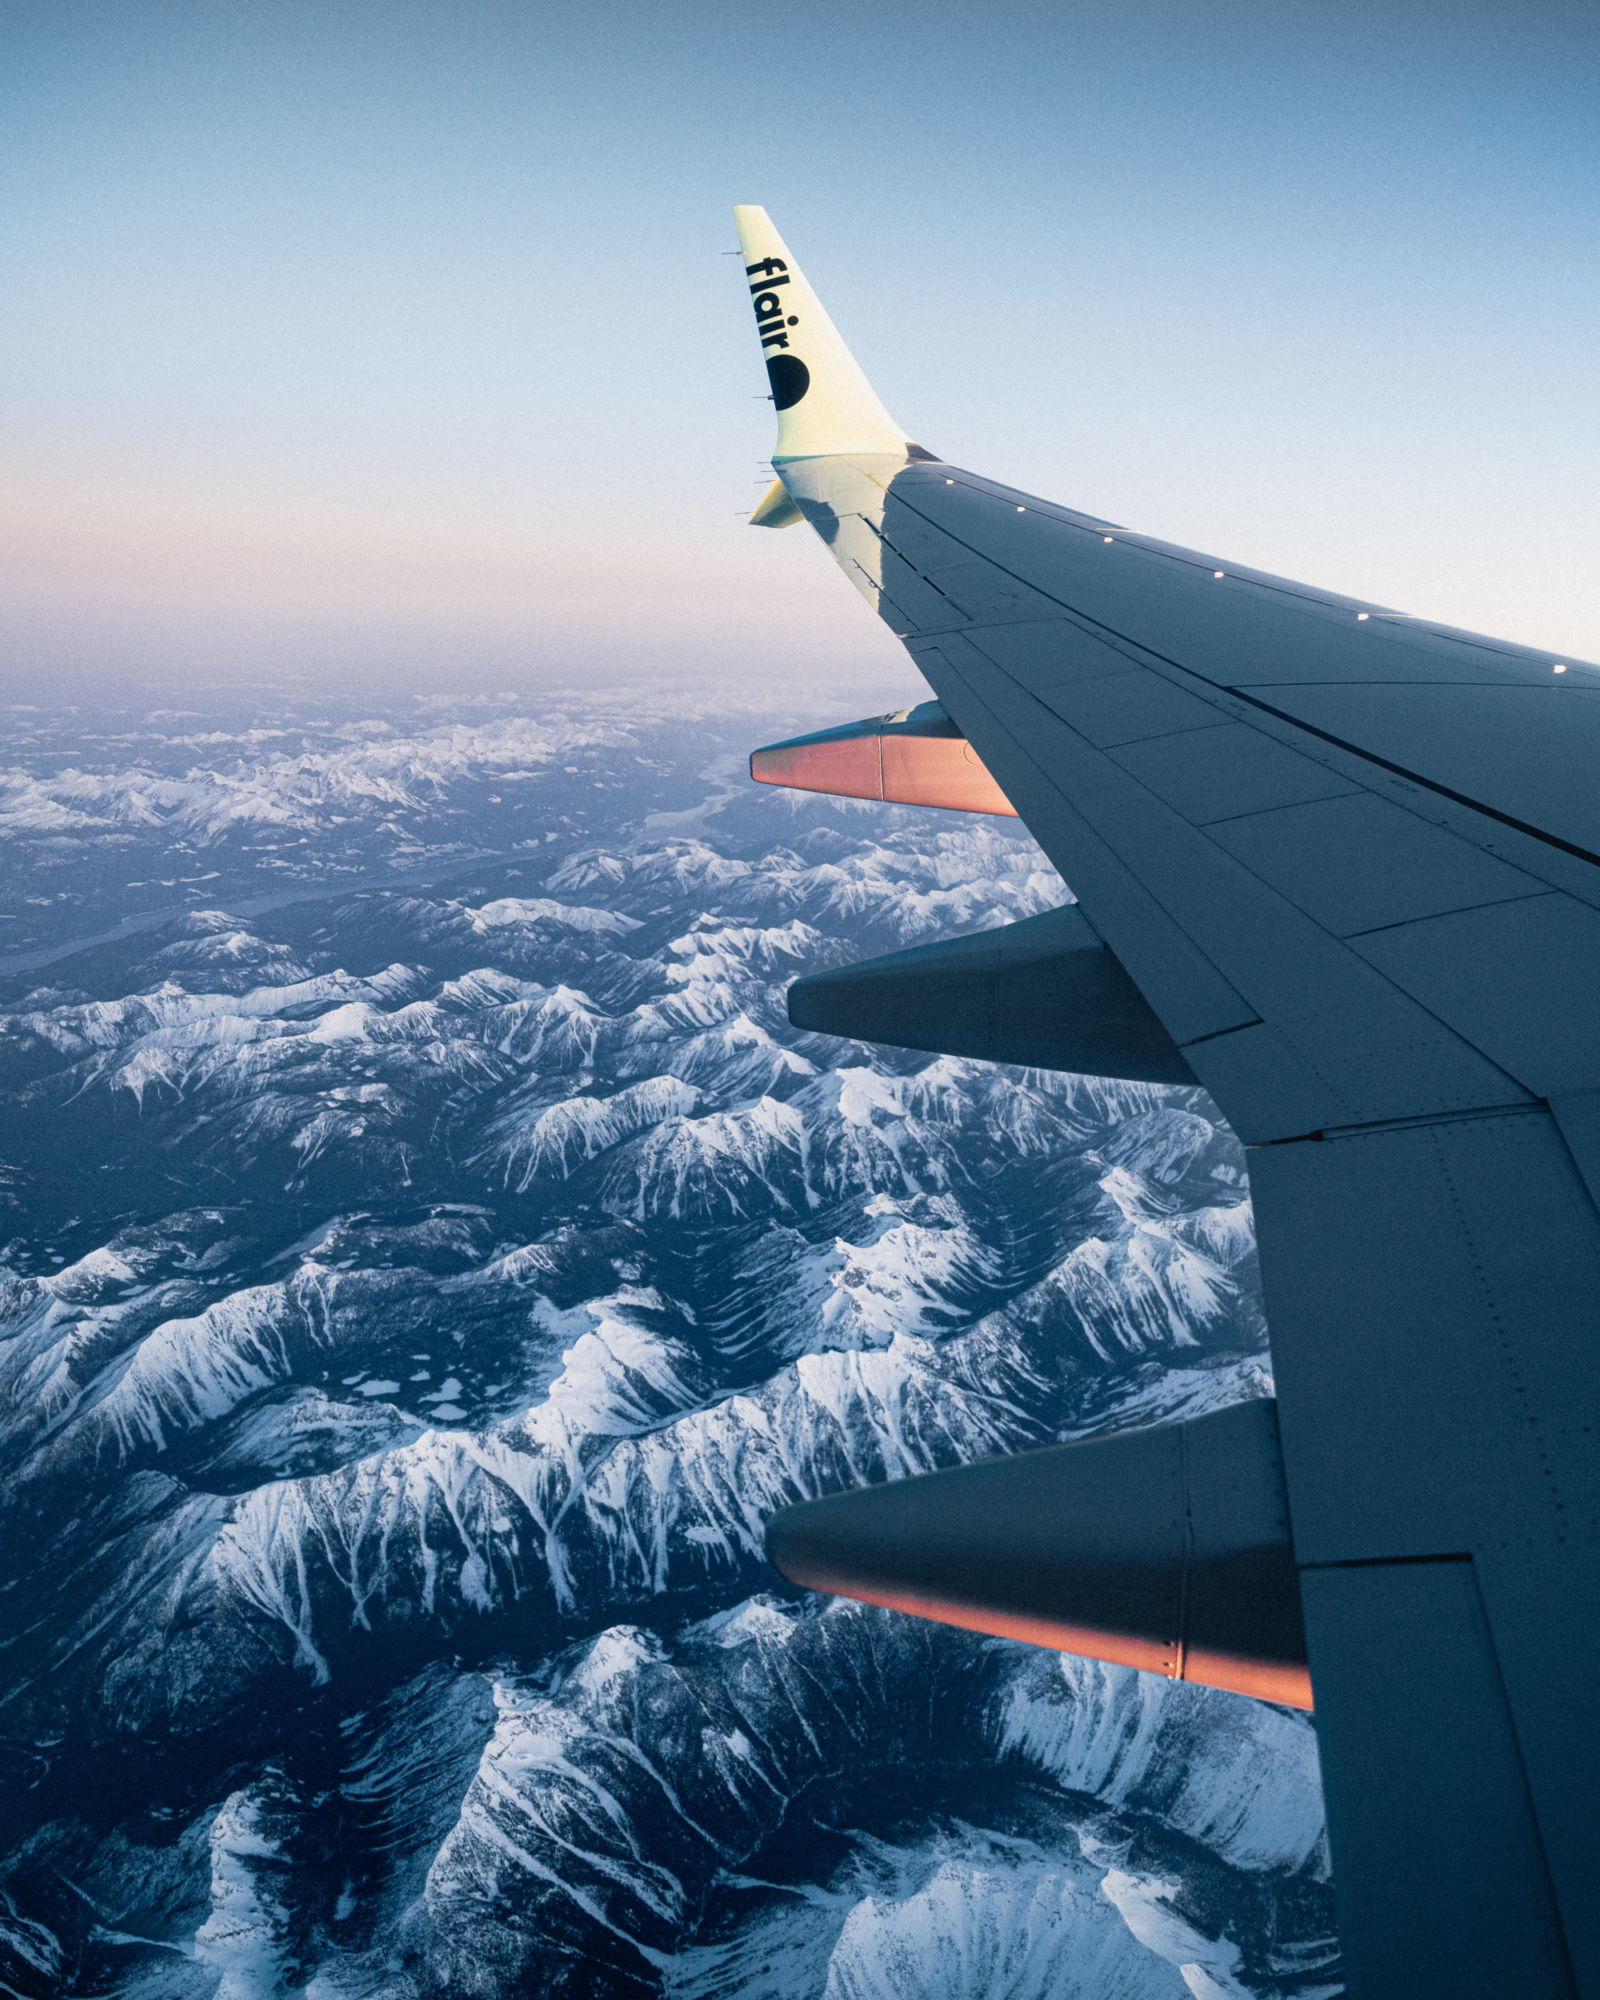
Capture stunning landscapes on your next flight
Planning accordingly to take photos from an airplane can produce some spectacular results. It doesn’t seem to be that complicated, but if you are serious, there are several things that you should consider. Below are the seven key elements in planning your shoot. Additionally, below I have tips on getting your settings dialed and knowing how to take the best shots.
Book Your Seat in Advance
Choosing a window seat is essential for taking photos from an airplane. Make sure to book your window seat in advance, if possible. Window seats on the opposite side of the sun will provide the best light for your photos.
When I bought my plane tickets, only a handful of seats were reserved. I didn’t think that it was going to be necessary to book a seat in advance as there would probably be enough free seats to move around. But, I was way wrong. The entire flight was full, with 96 passengers on a flight with 99 seats.
What Time is the Sunrise/Sunset
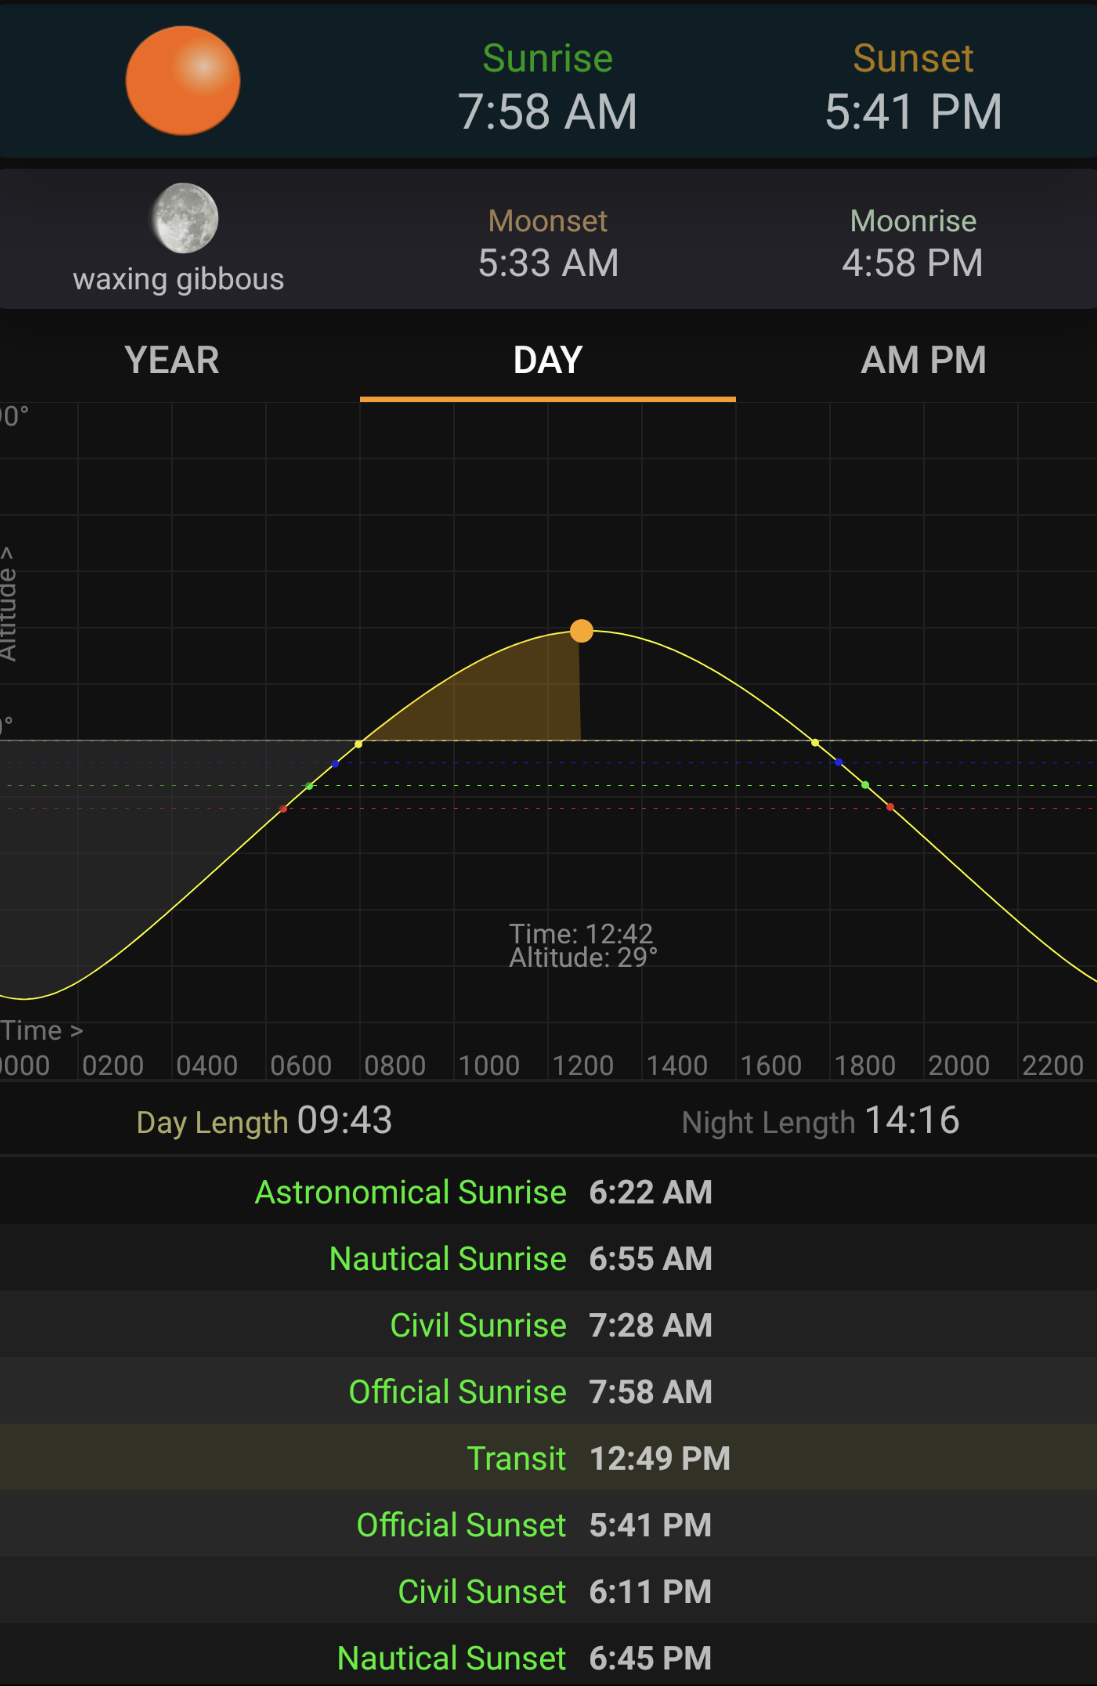
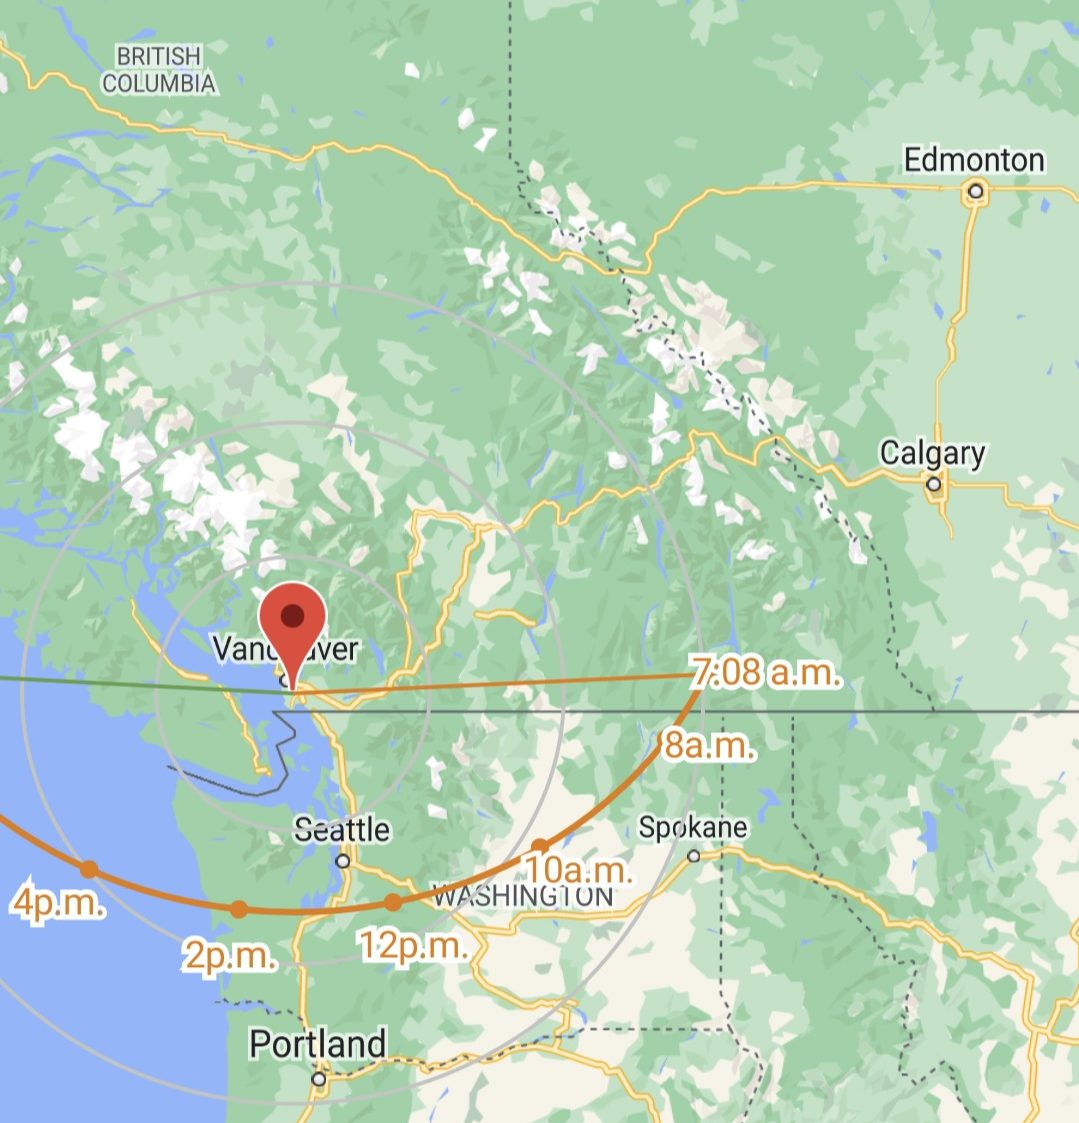
To capture the best photos, it’s important to know what time the sunrise will occur during your flight. This will help you plan when to take out your camera and be ready for the perfect shot. You can easily look up the time of sunrise online or by using a smartphone app. In my case, the sunrise was to be at 7:30 AM.
Factor in Time Zones
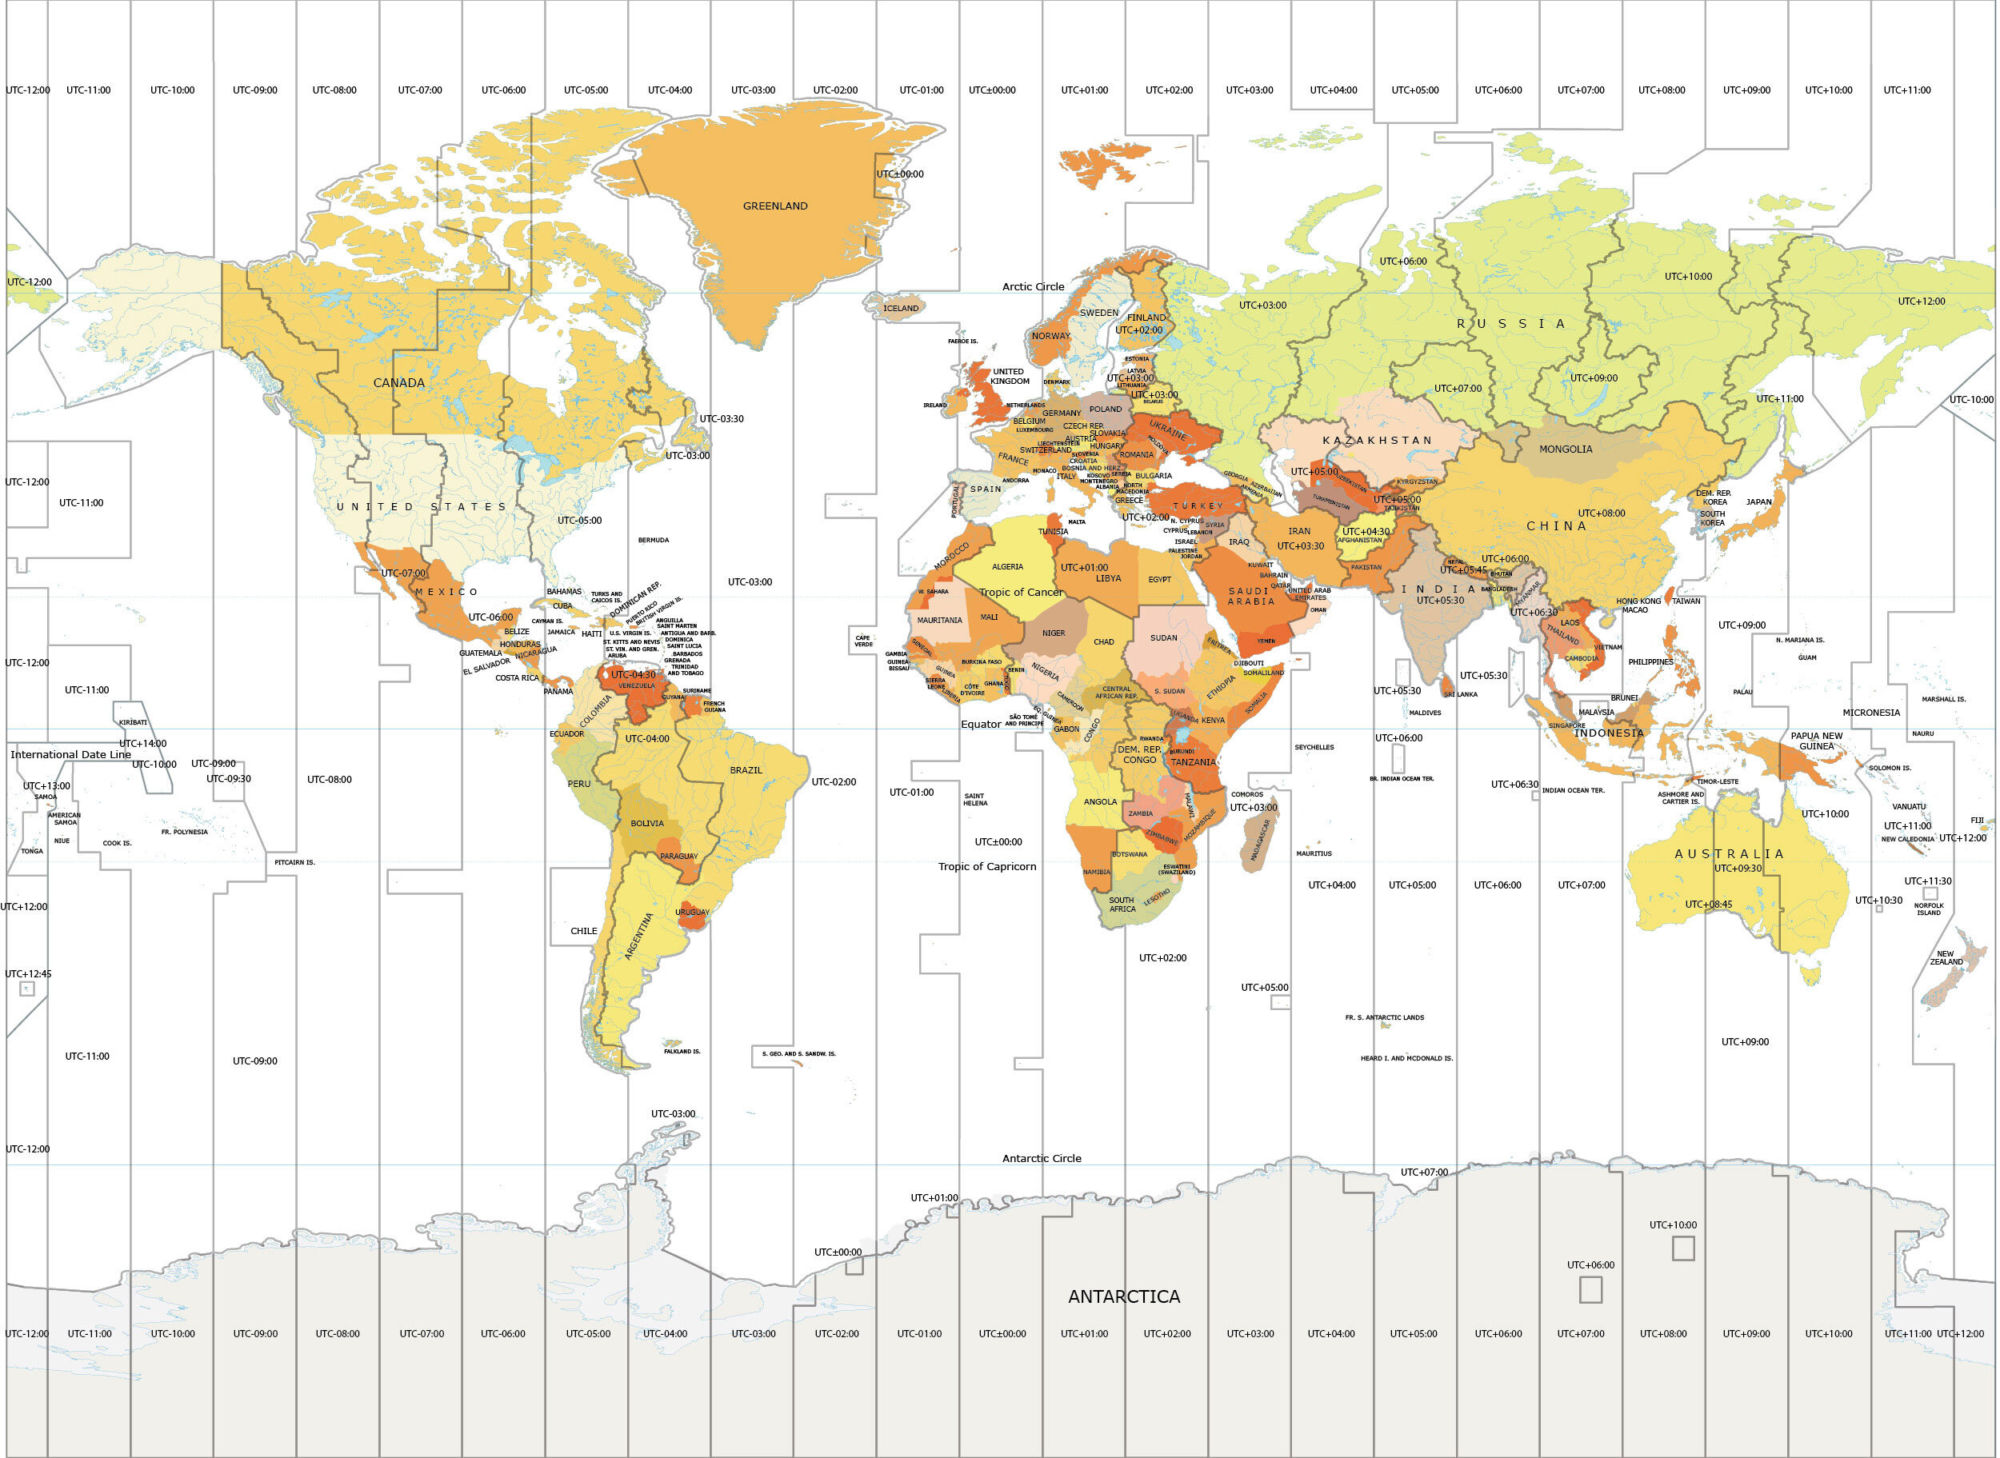
When planning your photo-taking strategy, it’s important to factor in time zones. Keep in mind that the time of sunrise may be different at your destination than at your departure location. Calculating for the time zone will probably be the most difficult and confusing thing when it comes to planning. My flight from Vancouver to Calgary was only 1-time zone (1 hour) difference. And that was enough to throw me off. If you are travelling across multiple time zones, planning will be a lot harder, and more unpredictable as delays may occur, ruining your strategic planning. But, if you have the time zones figured out, make sure to adjust your plans accordingly and check the time difference before your flight.
Know the Length of Travel
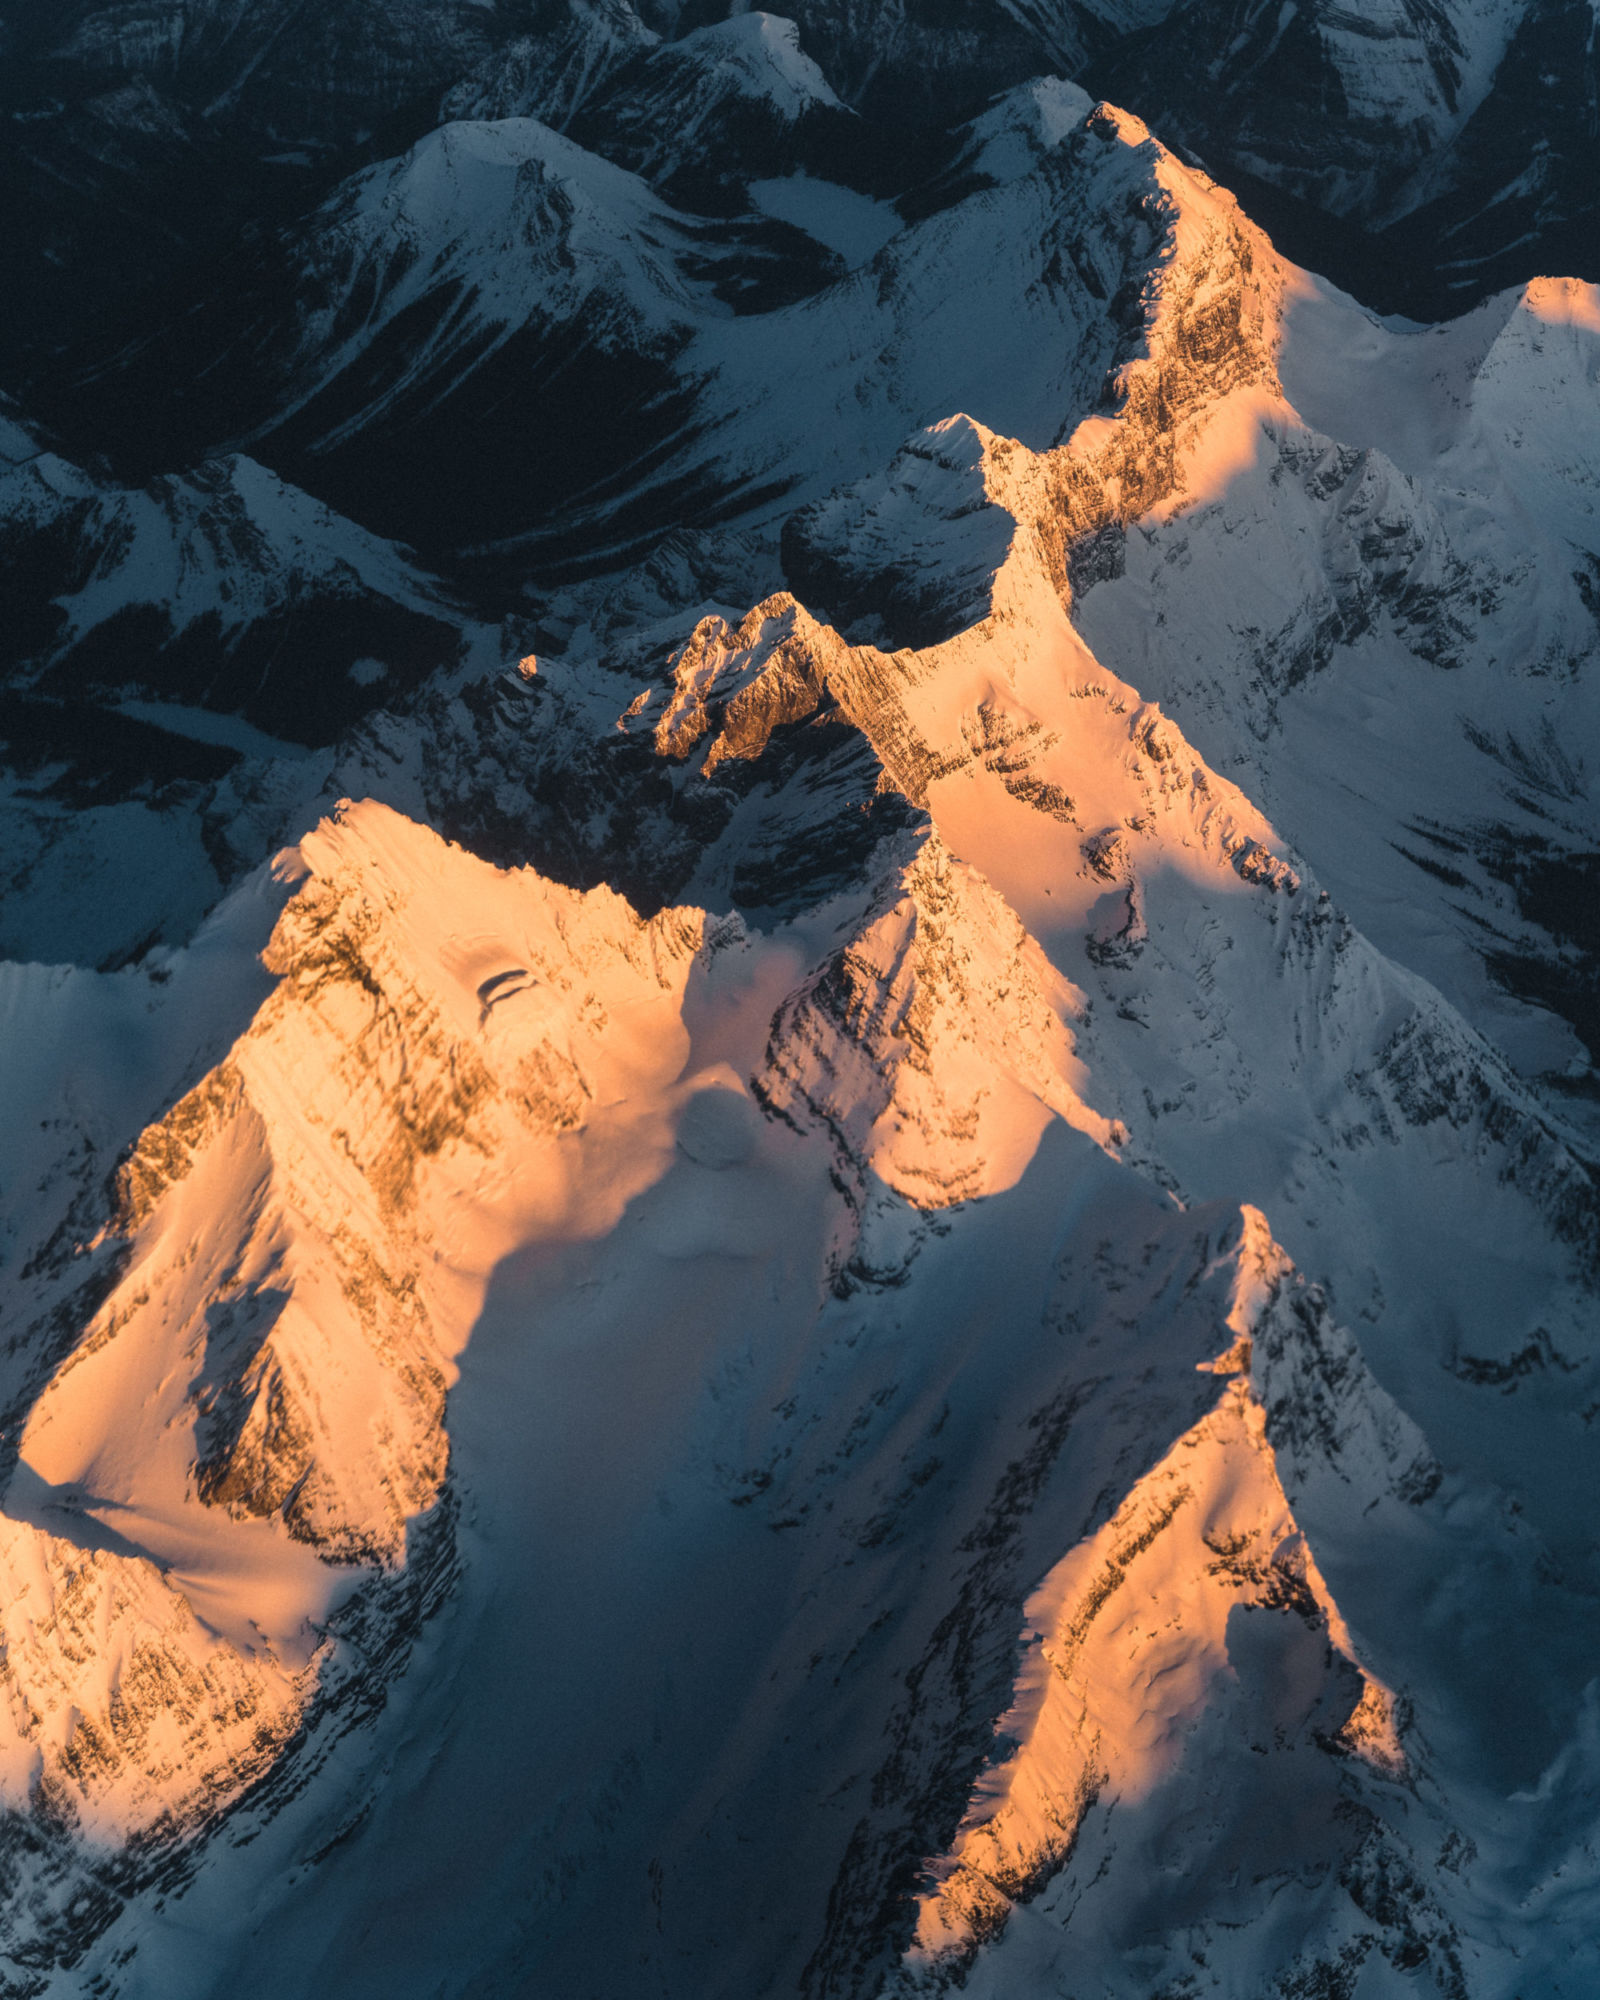
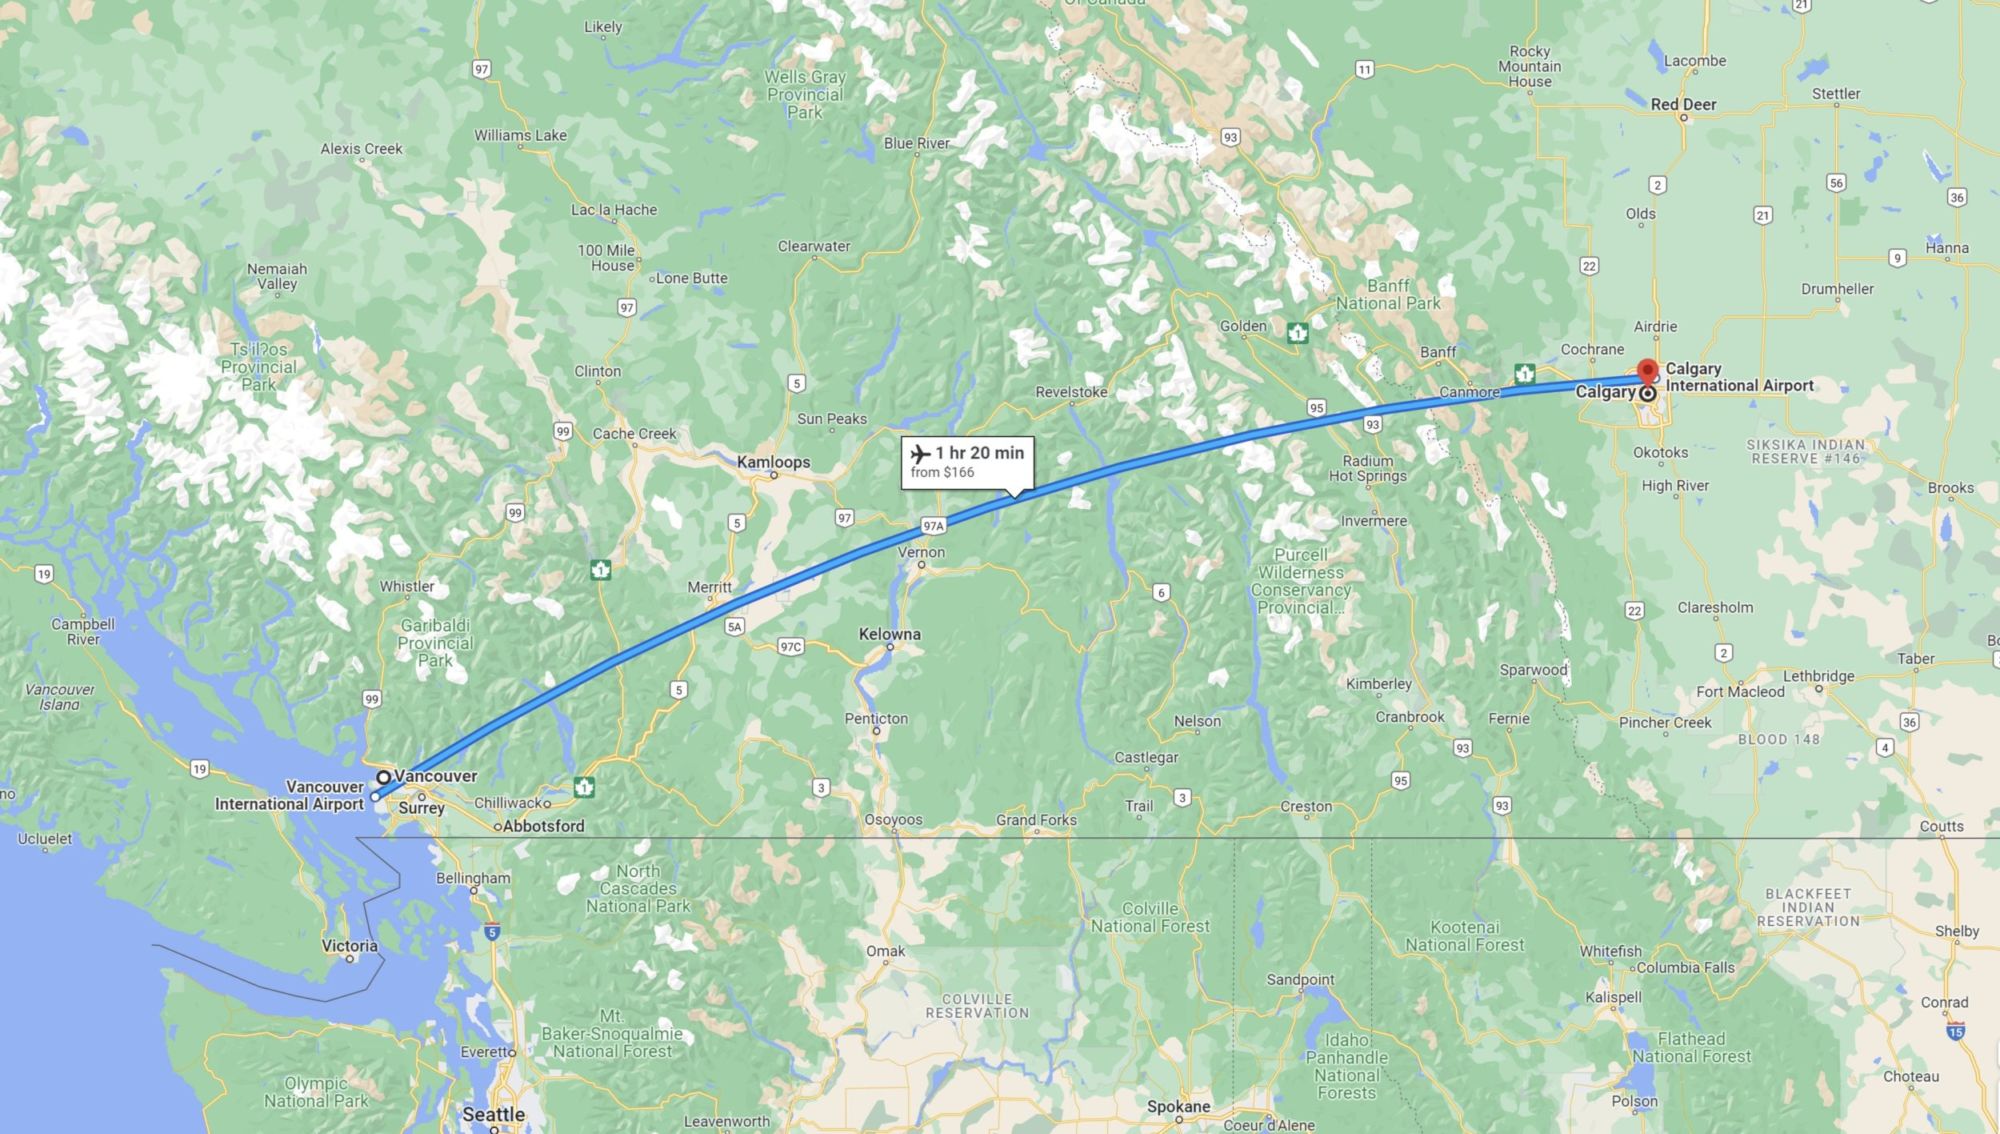
Knowing the length of your travel will also help you plan the best time to take photos. If you have a long flight, you may want to consider where the sun will be at that time. My flight from Vancouver, BC to Calgary, AB was 1 hour 5 minutes, and I knew that I wanted to photograph the Rocky Mountains as we flew over them. Because I lived near Calgary, I knew that they were very close to the airport, and by plane, it would be only a few short minutes before landing. So, this meant that I would be taking the majority of my photos just before landing starting at around the 45-minute mark into my flight.
What Time are Available Flights
If you have the option, choose a flight that will allow you to take photos during the most optimal lighting conditions. If you are flexible with dates and airlines, better times might become available. When I was booking my flight, I had two options: 6:00 AM or 7:00 AM departure. Because I also knew that I was to be crossing one time zone +1hr, and the flight was one hour long, the mountains were about 45minutes into the flight, and the sunrise was at 7:30 AM, the 6:00 AM departure was the most ideal.
Use a Sun Position App
Using a sun position app can help you determine on which side to sit on the plane. Ideally, sitting on the opposite side of the sun will reduce window glare, giving you optimal photo results. Apps such as Sun Position, Sunrise/Set can help you visualize the path of the sun.
Where to Sit Along the Plane
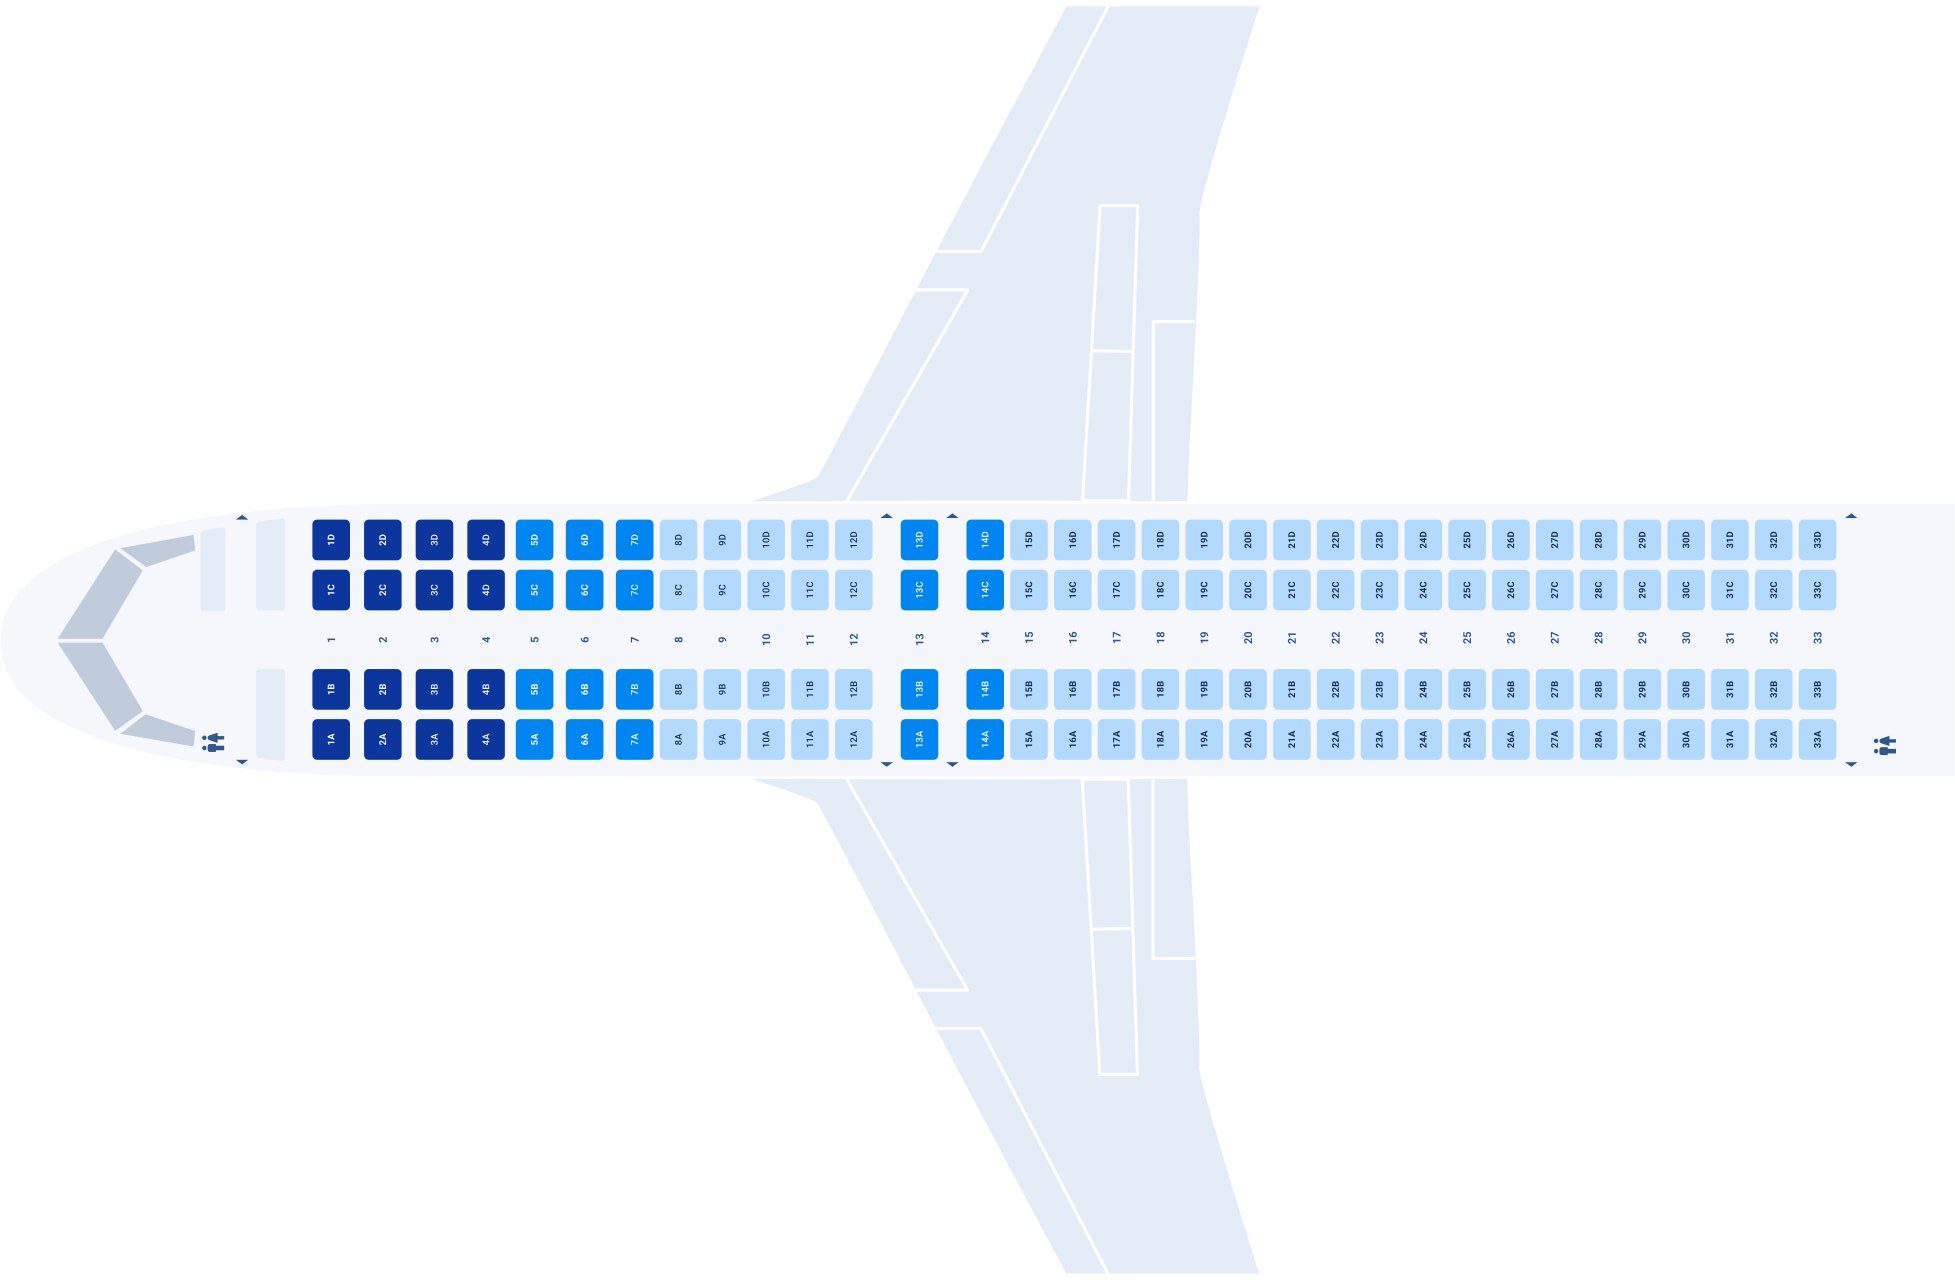
I believe that there are two optimal spots on an airplane. It is either in front of the wing or behind the wing. The further away you are, the more you will see, whereas, if you sit right above or too close to the wing, you will get an obstructed view.
Every plane will be different and it will all factor in the decision you make. The front sections of most planes would be the 1st Class, and the back section would be the economy. Not all planes are divided this way, but you should also keep that in mind, as the front will tend to cost more money. But, if there is no difference in pricing, you could consider this option. Having emergency exits would be a big no-no for me, as you may not be allowed to have your camera with you.
Looking at the example below, if I were to book a flight, I would book something between row 2A and 5A or 2D & 5D. If I was to consider the rear of the airplane, which is my personal preference, as I would rather see the wing than the engine, I would choose rows 22A to 30A or 22D to 30D. Being to far forward or too far back could limit your vision and may not give you the best vantage points for photography. So, the best spot would definitely be the sections in front or behind the wing – giving a few rows of space just before or after the wing.
Camera Settings
For optimal results, it’s recommended to shoot in manual mode and adjust your settings accordingly. Practice shooting distant objects out of a moving car. This will help you understand what settings are needed and how movement can hinder your ability to shoot your images.
Shutter Speed
Use a high shutter speed such as 1/200th of a second or faster to avoid motion blur. Planes move fast, and landscapes will change very quickly, so having a fast shutter speed will ensure that you capture it with detail.
Aperture
Depending on how dim the conditions are, if you are shooting in a lower aperture such as f/2.8, it will help you capture more light in your image, which means a lower ISO and a faster shutter speed can be used. The disadvantage is that your images will sacrifice sharpness and you may end up with a less in-focus wing (if it’s in the shot). Ideally, when shooting great distances or wanting something to be as sharp as possible and in focus, a higher aperture like f/4, 5.6, or 7, will give you better results. But, if the lighting isn’t optimal, a lower aperture may be needed.
Use a Polarizer
Try using a polarizing filter to reduce glare and improve image quality. A polarizer filter will darken the sky to a nice deep blue tone, giving pop to any clouds or landscapes. Depending on the direction of the sun and the angle of the flight, polarizer filters may or may not work as they must be used at a 90-degree angle to the light rays to work properly.
Shooting Tips
Shooting out of a plane window may sound straightforward, but it can be quite challenging because of the fast-changing landscapes and the lack of varying angles to choose from.
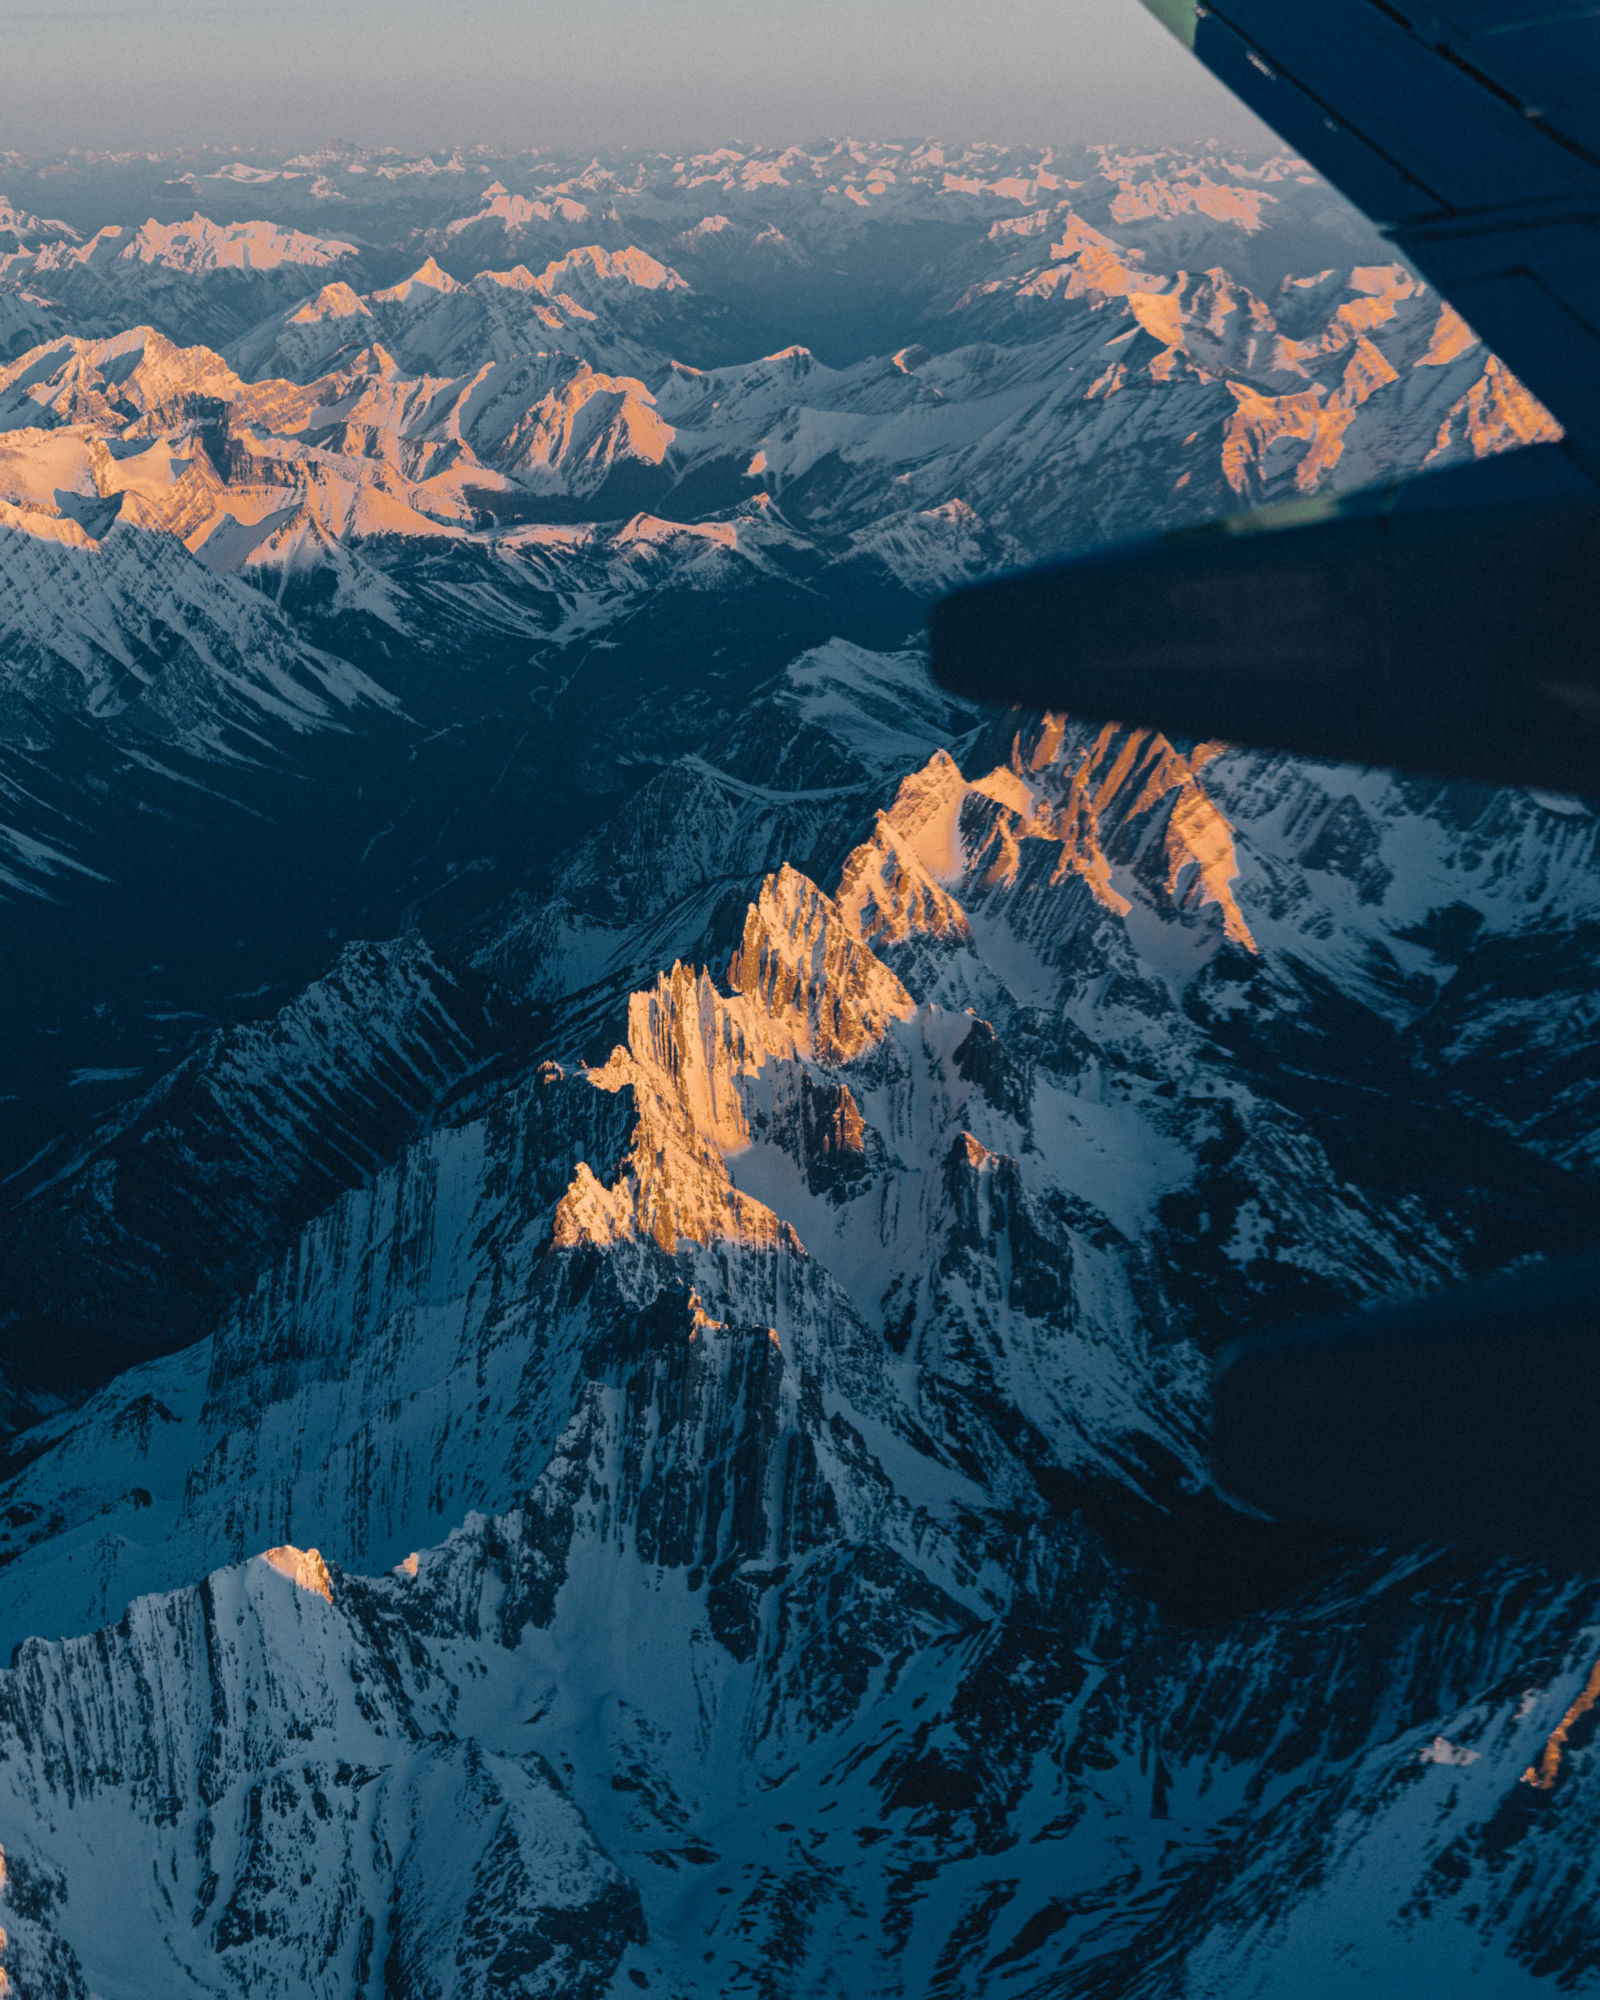
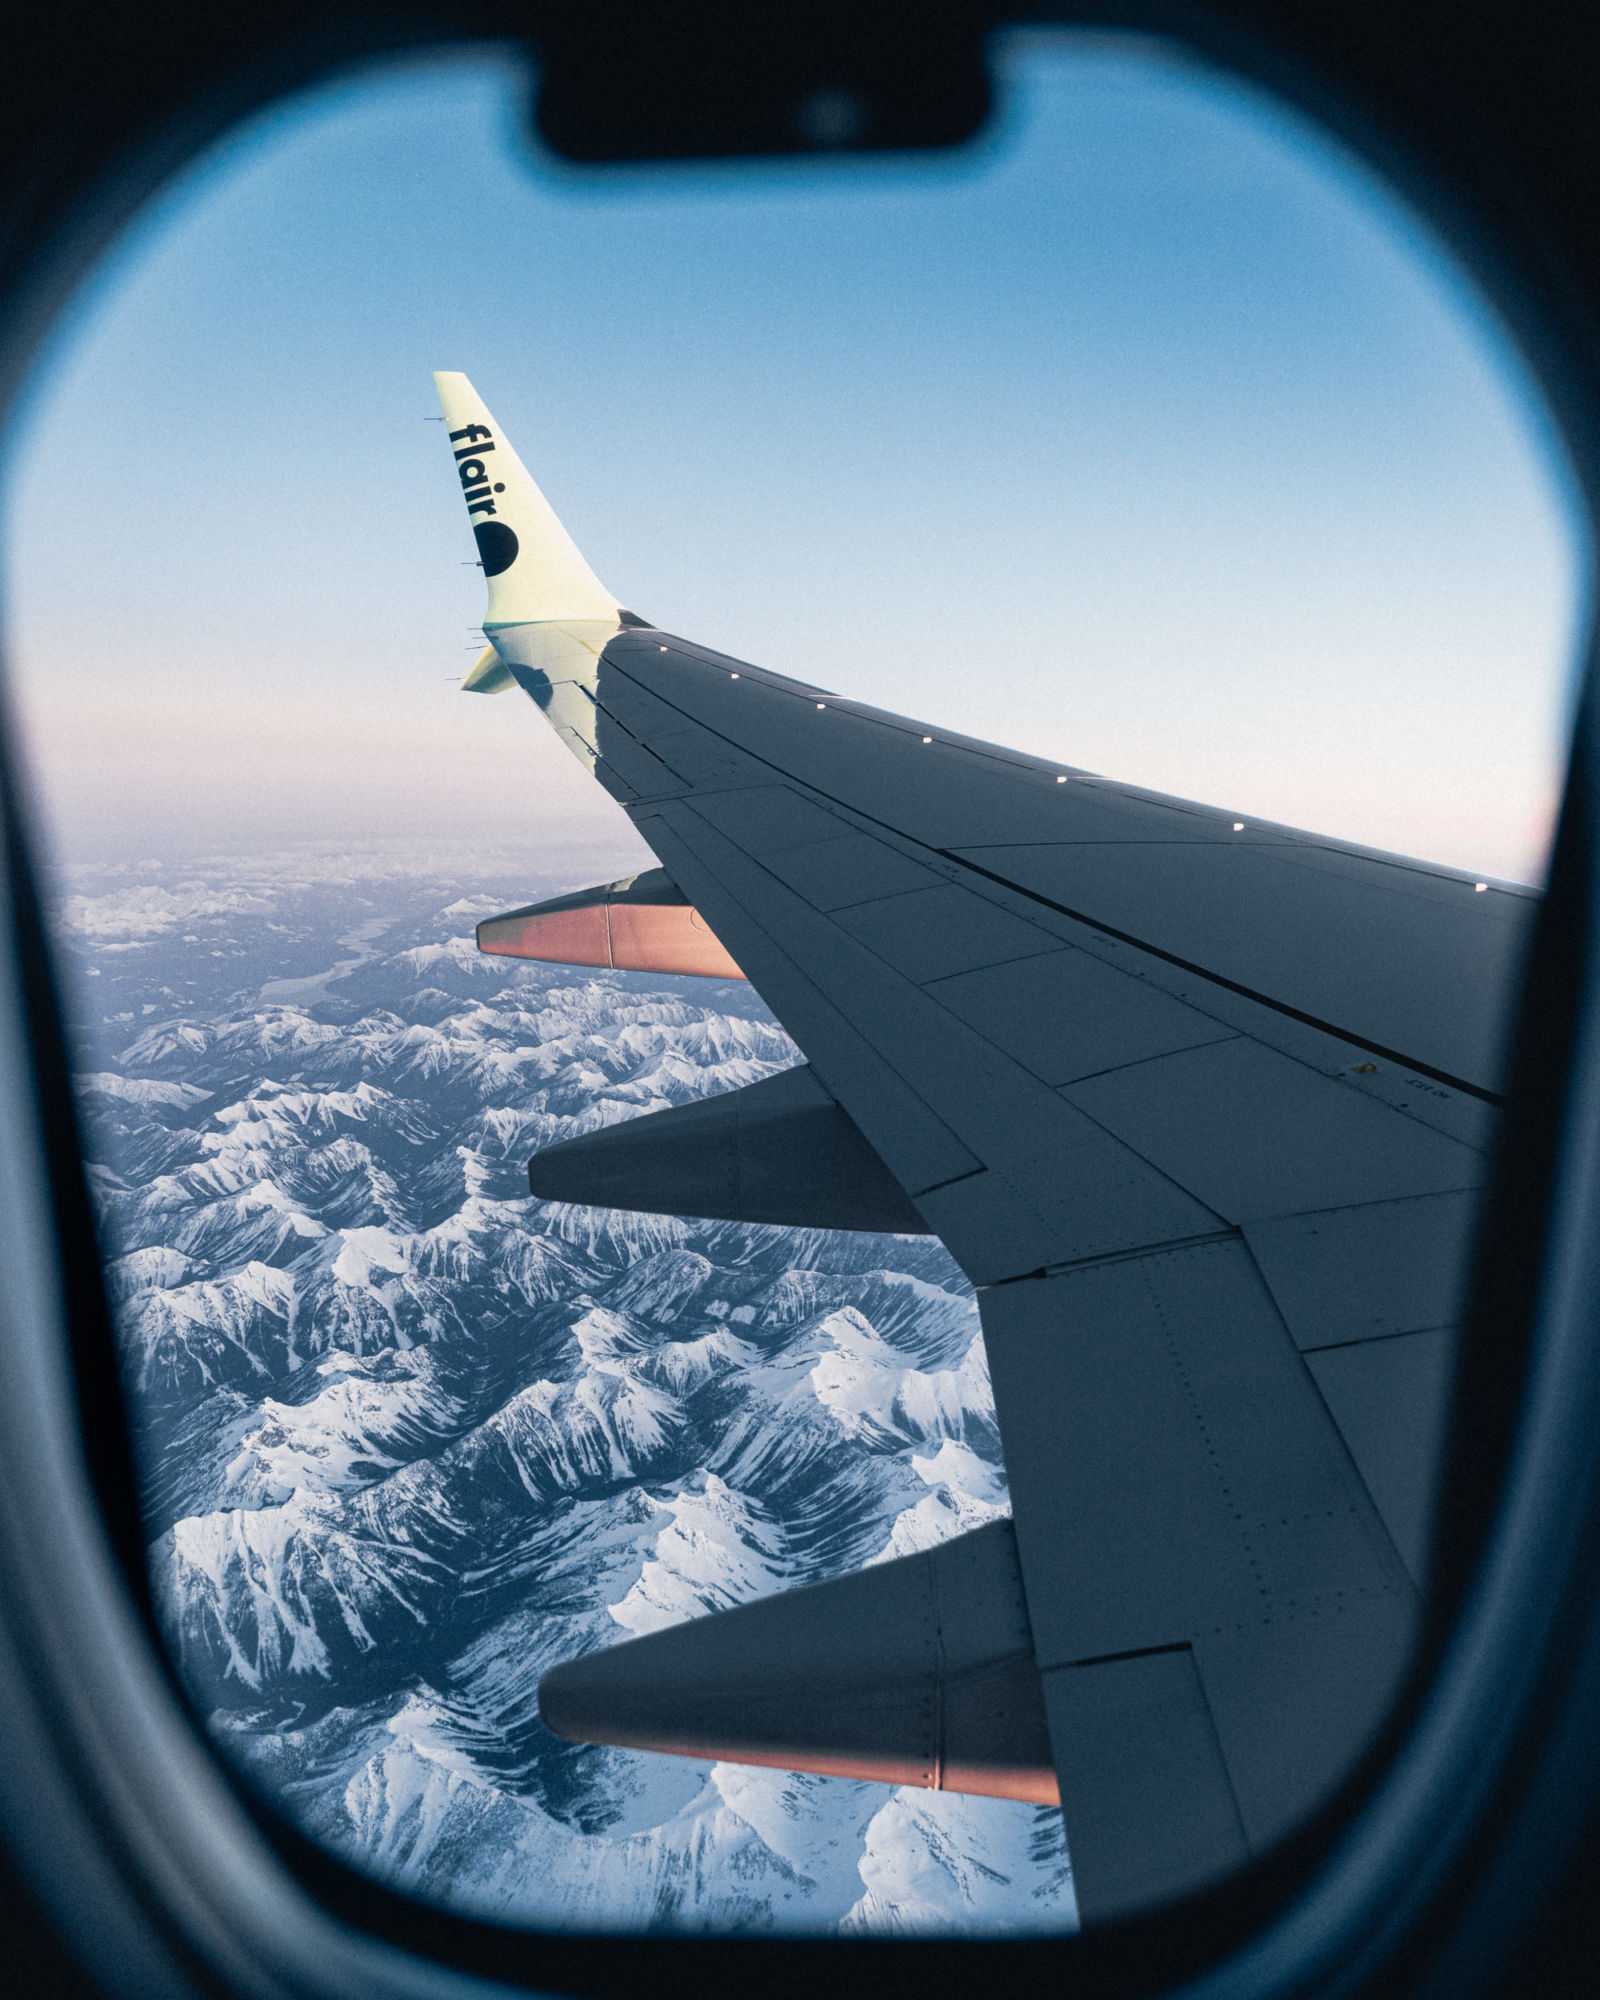
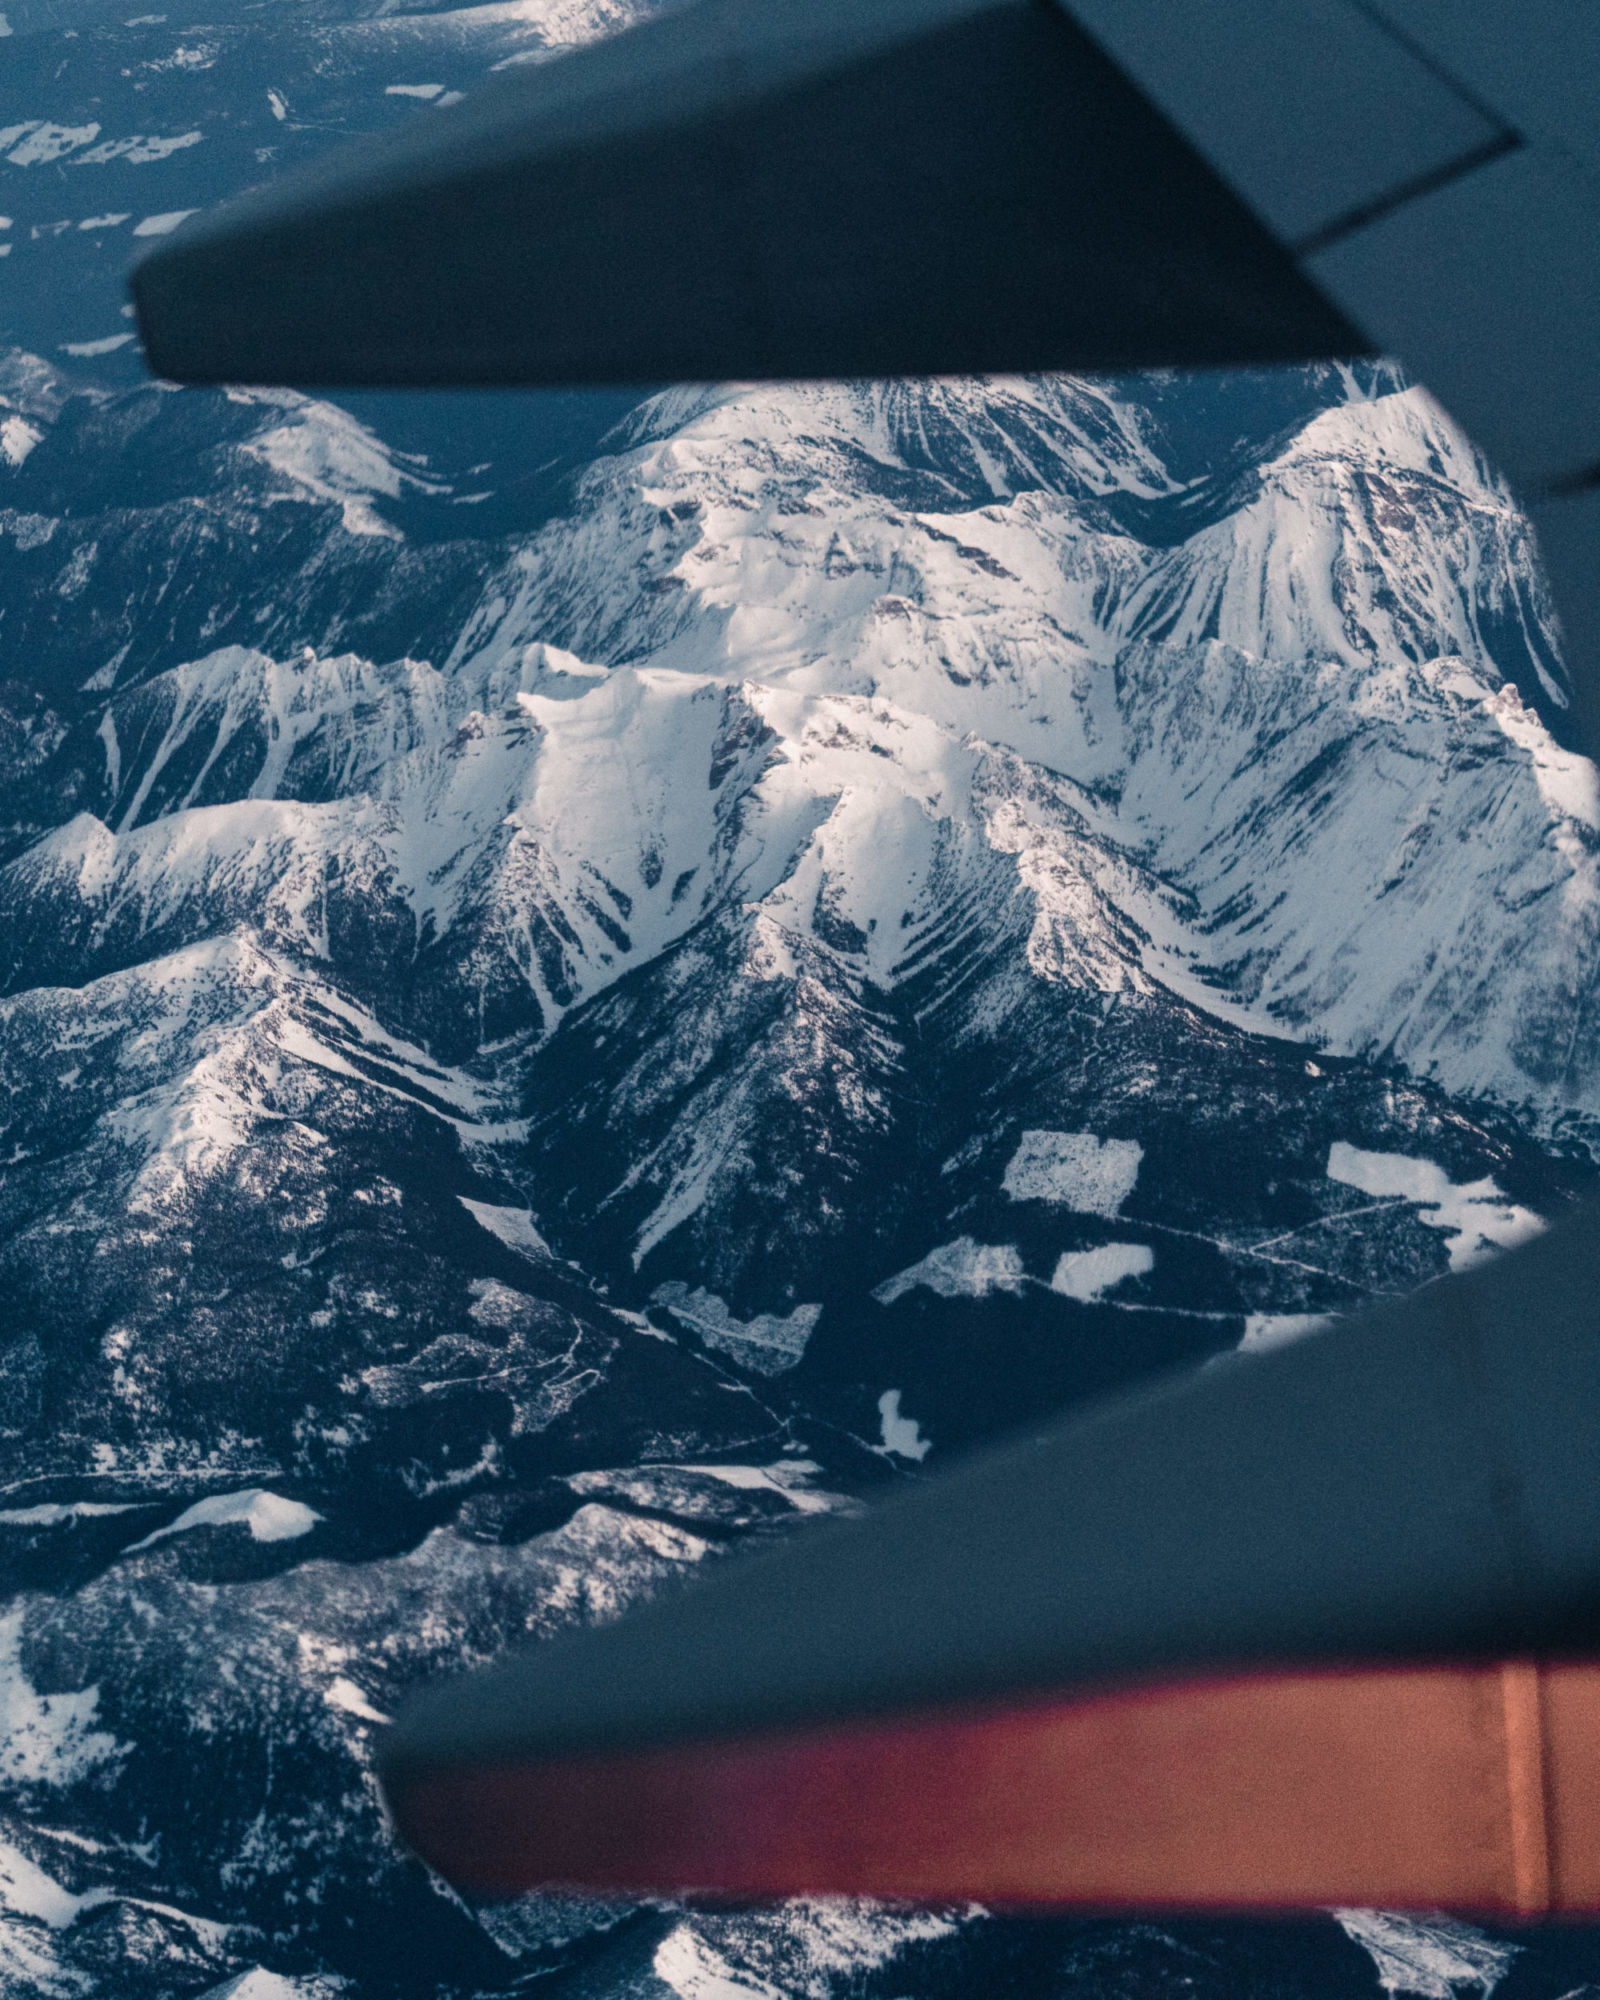
Add Perspective Interest
Capture different angles and perspectives of the landscapes below and the airplane itself, such as the wing, engine, or tail. These shots can add interest and variety to your photo collection and give it a more human point of view.
Regularly Clean Windows
A dirty window will ruin your photos, so it’s important to clean it regularly as you take photos. Use a microfiber cloth or your shirt to remove any smudges or dirt from the window.
Shoot as Straight as Possible
Try to avoid shooting into the corners of the window frame. Shooting on a sharp angle forward, up, down or back can result in blurry images due to the window glass. Ideally, shooting as straightforward with minimal tilt will give you the sharpest images.
Reducing Glare
The best way to reduce glare is by choosing the correct seat, which was discussed in the section above. The other way is by keeping the camera lens as close to the window as possible. Additionally, if the lighting inside the airplane is too bright, glare will be a bigger issue, covering your camera and the window with your jacket will stop reflections, but it will make shooting much harder.
Keep Your Camera on your Lap
It’s also a good idea to have your camera easily accessible during the flight so you can quickly take photos when you spot a great opportunity. Keep your camera in your carry-on bag and avoid stowing it in the overhead bin if possible.
Shoot Wide & Telephoto
To capture a variety of perspectives and views, consider shooting with both wide and telephoto lenses. Wide-angle lenses are great for capturing expansive views and landscapes, while telephoto lenses can help you zoom in on specific details and landmarks.
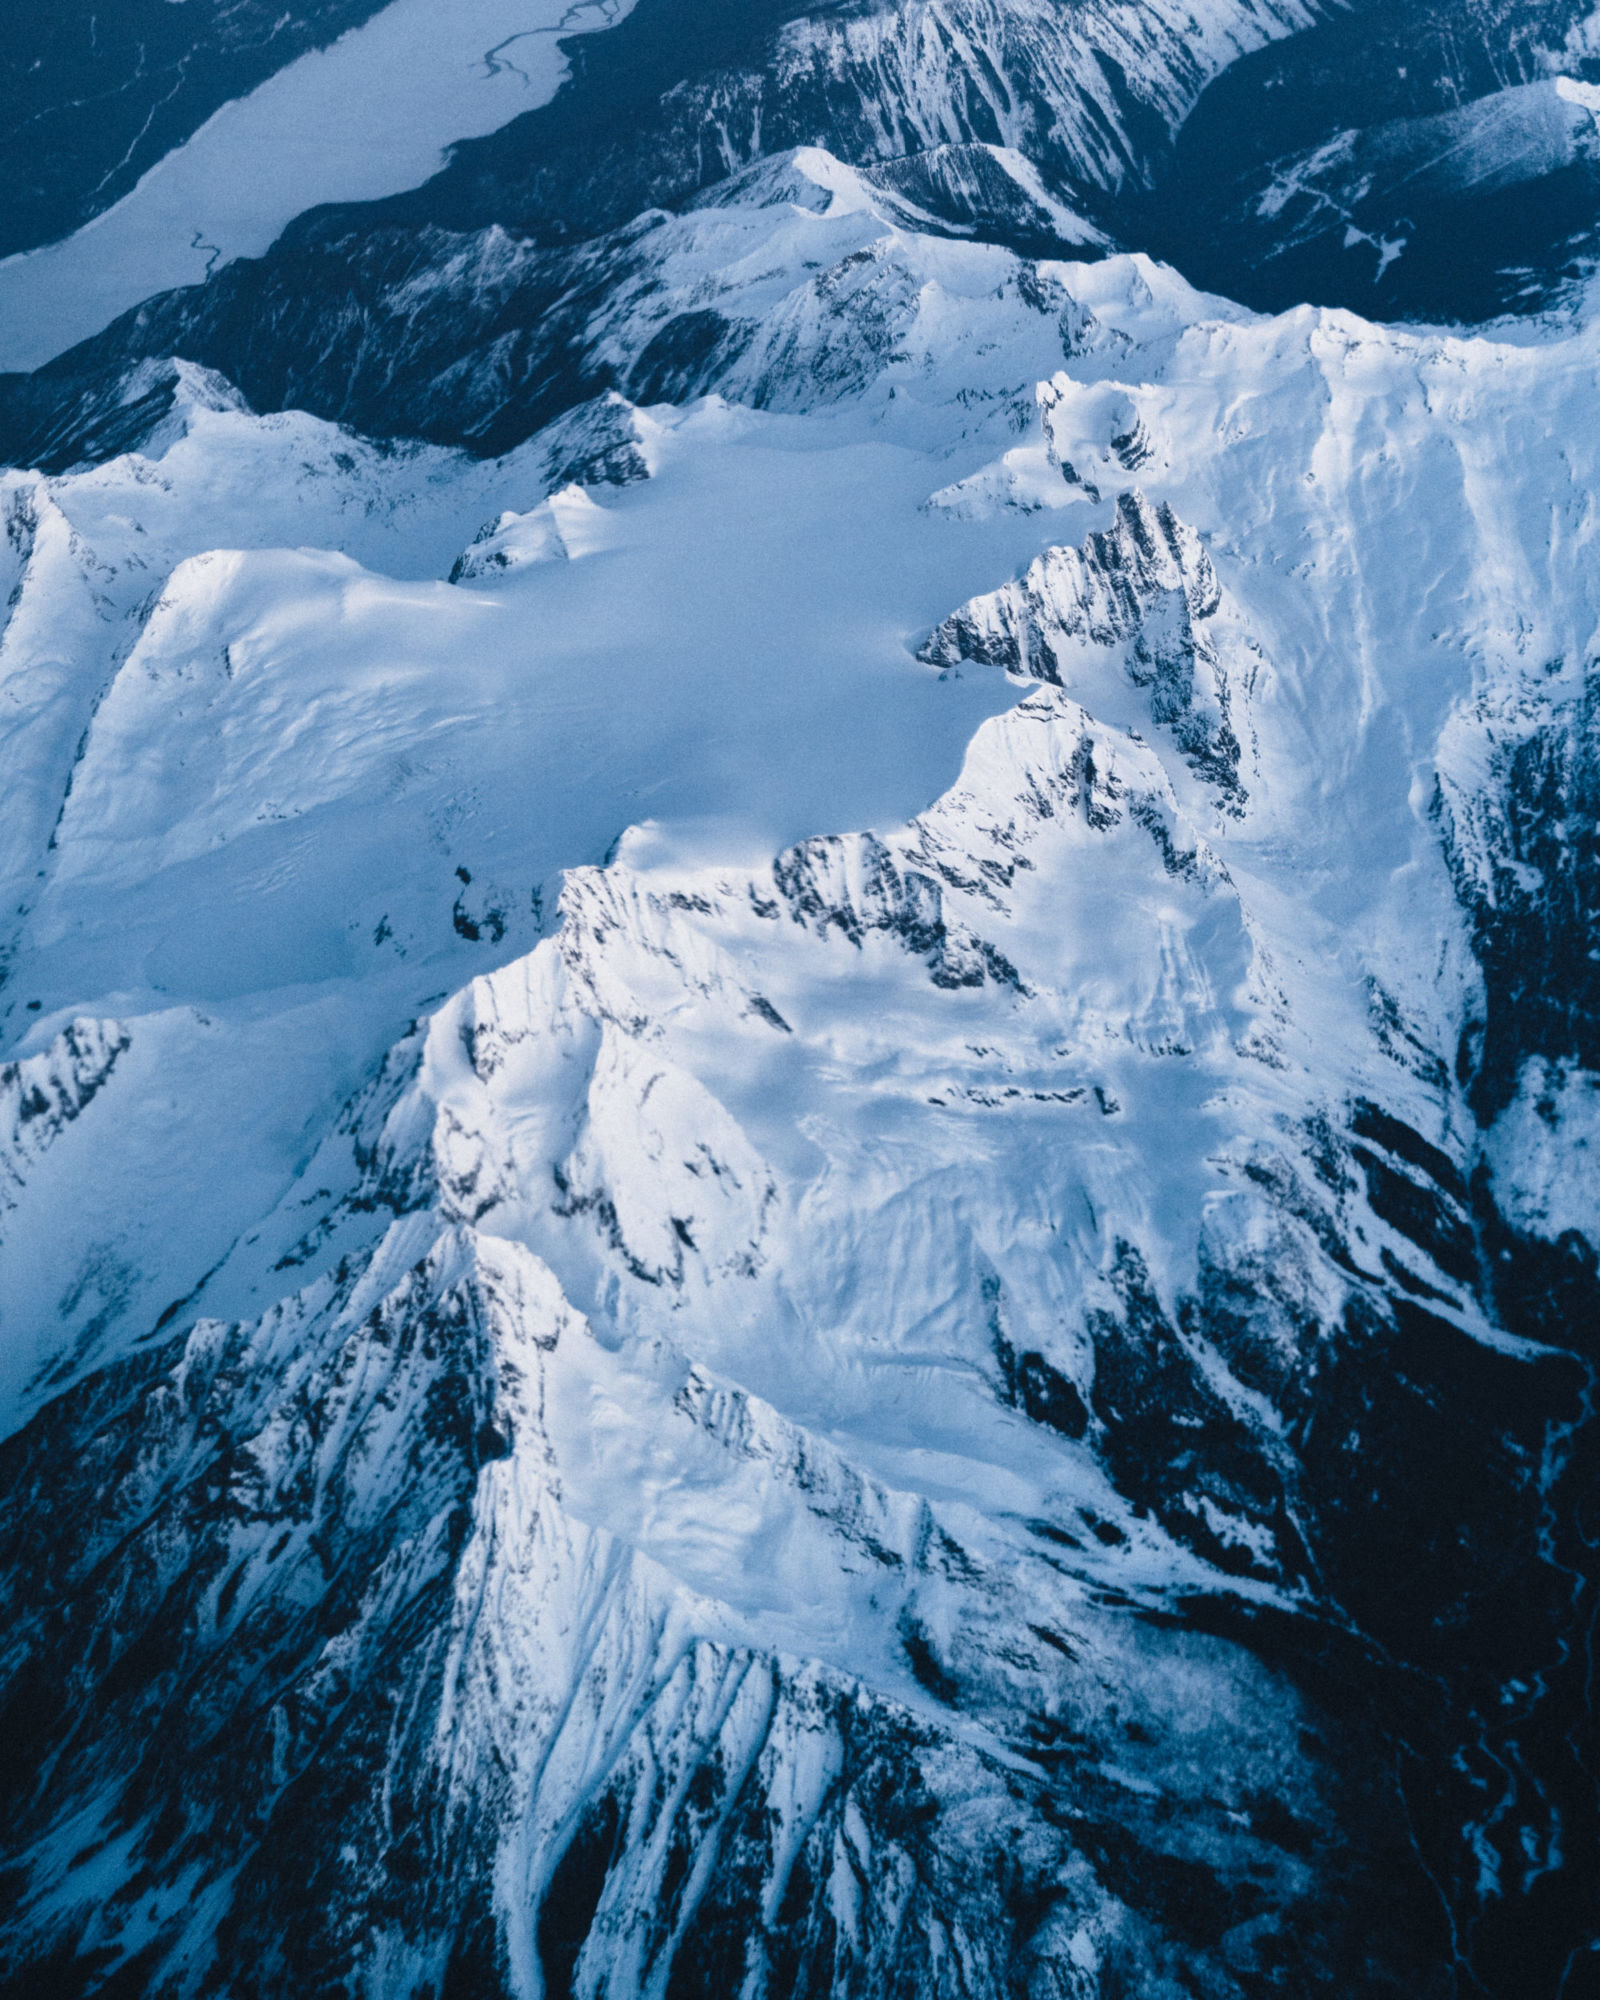
Optimal Lighting
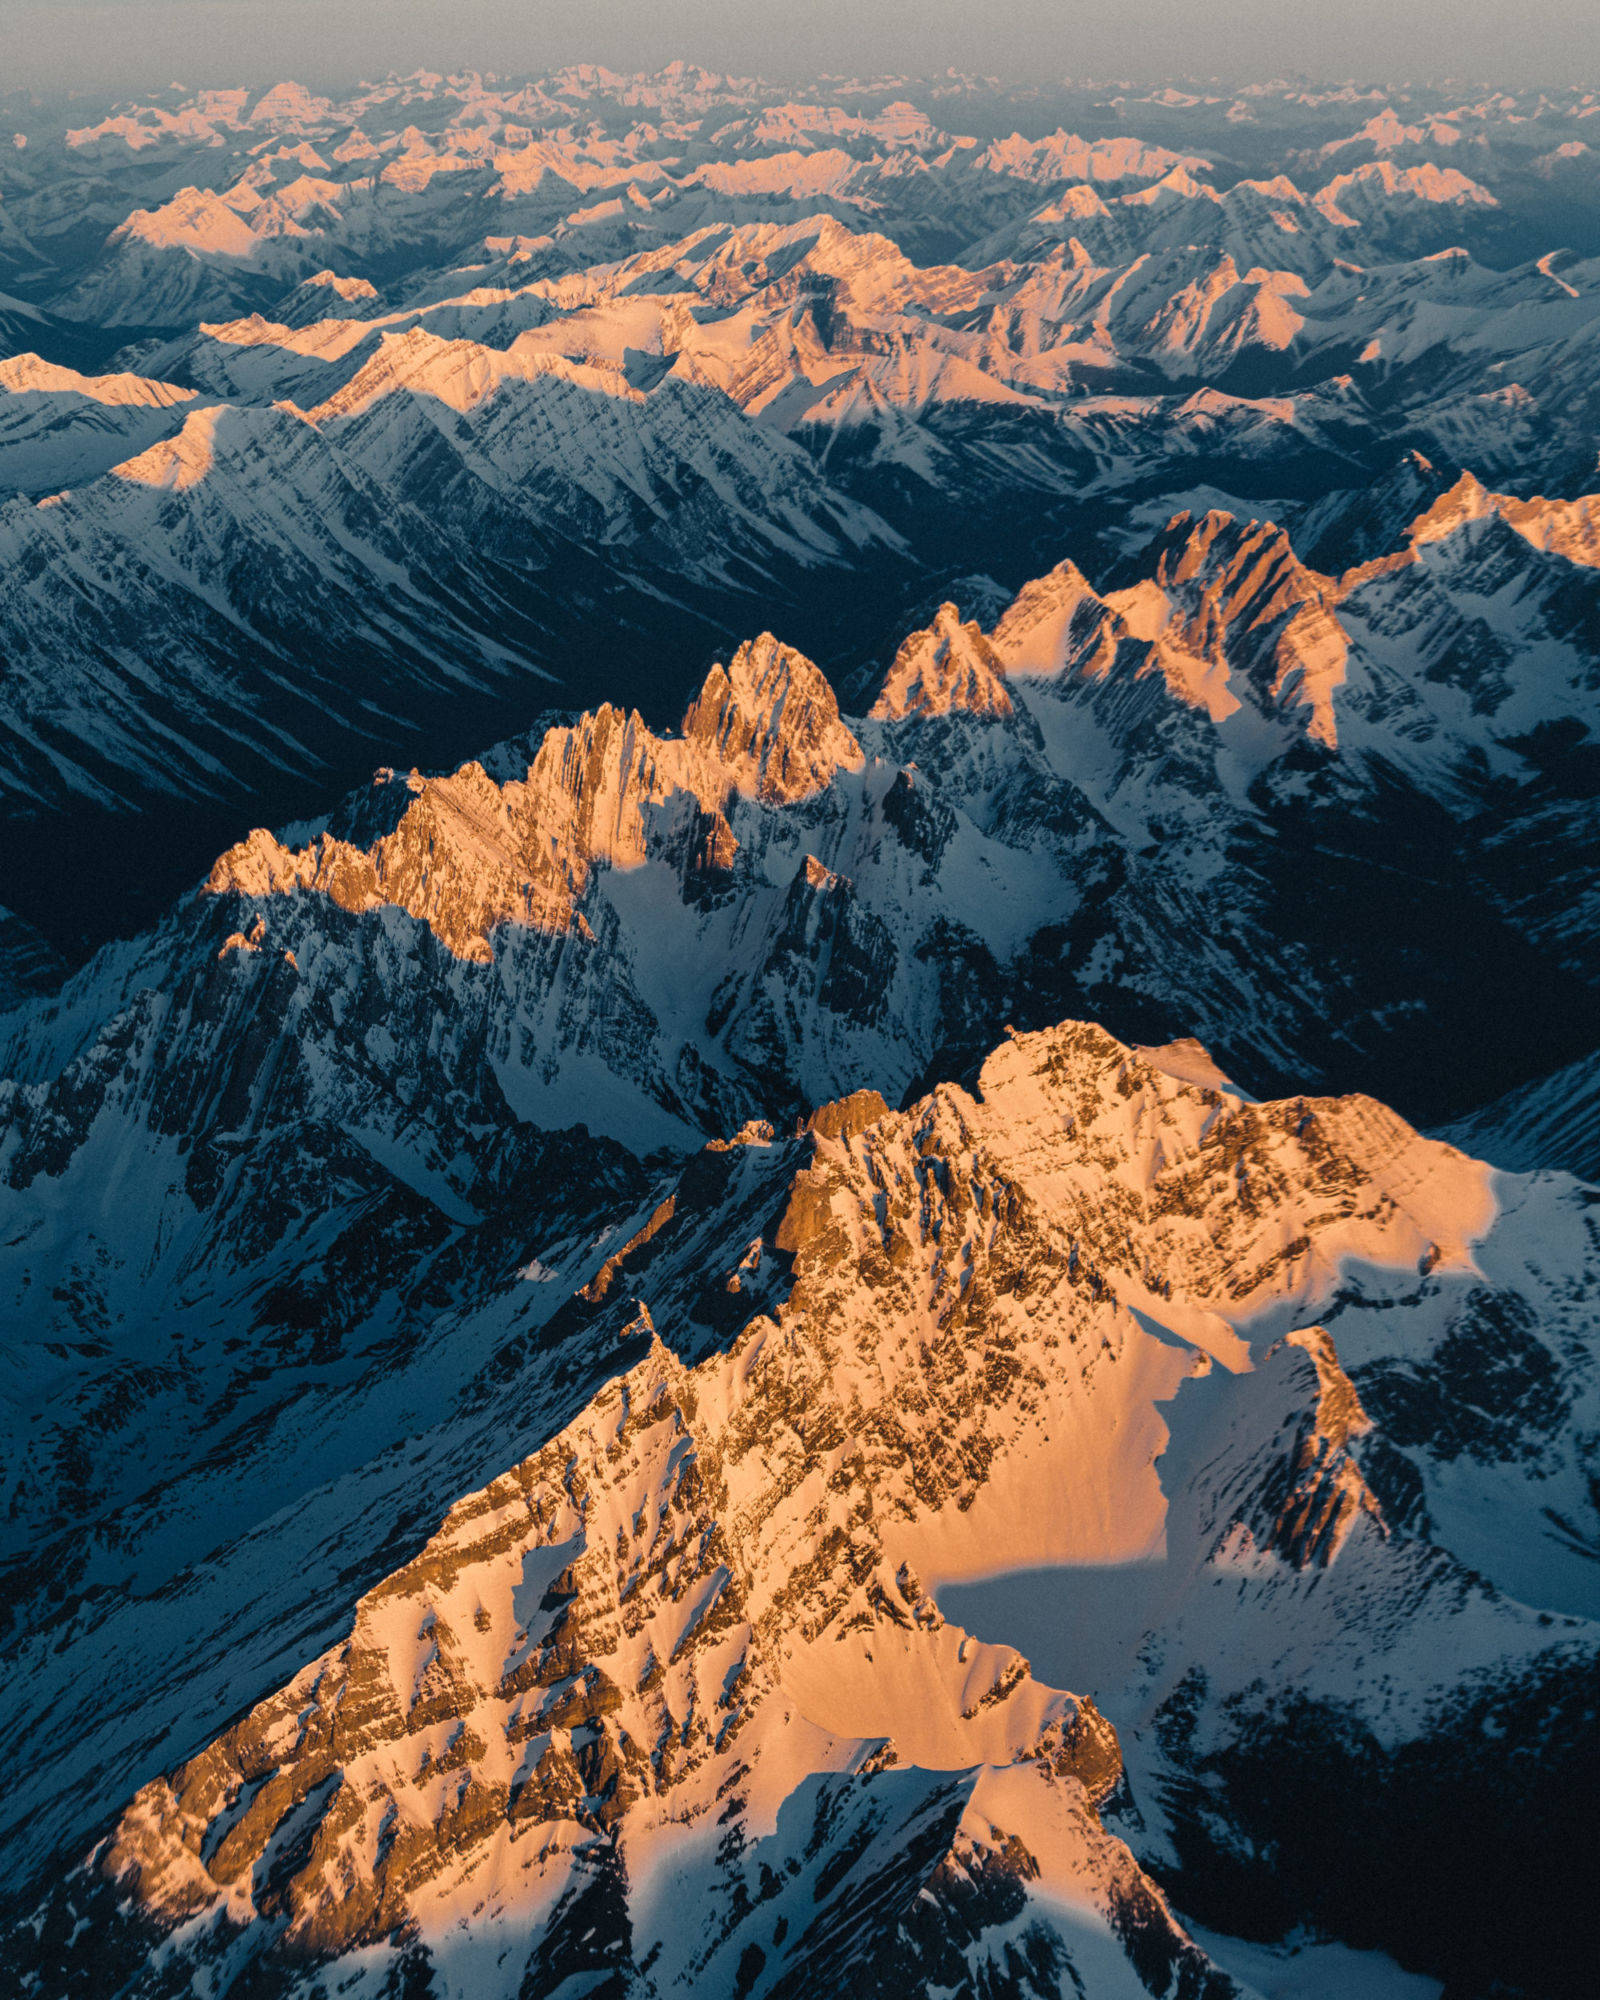
The best lighting for photography is during golden hour or blue hour, although less common. Golden hour happens twice a day, from the moment the sun rises to an hour after, or the hour before sunset until the sun sets. At this time, the sun is low, so it casts long beautiful shadows, creates a structure to your landscapes, and produces a nice orange glow. Shooting mid-day, or anytime after the first hour, or before the last hour of the day is still possible, but your images will appear very flat, giving no depth or perspective to the landscapes. This is especially true when shooting from high above and looking down.
On my flight, I noticed that golden hour was not an hour long, instead, it lasted about 10-15 minutes, as we were flying fast and toward the direction of the sun. If we were flying with the sun toward the sunset, it might be a little bit longer. But, neither less, it happens much faster than you’d anticipate.
Weather Can be a Bummer
You can prepare everything properly, but the only thing you can prepare for is the weather. That is, unless you are able to plan everything and book your tickets last minute, then maybe you can factor in the weather. But, often times, weather will be the only thing that can negatively effect what you can shoot. Even though you are flying above the clouds, it can be complete overcast below you, which means you wont see any landscapes. BUT, if you’re lucky, you will see a sunrise above the clouds, which could look amazing in itself.